How to Configure Waivers
Waivers are a critical part of managing liability and collecting consent from your guests. The Waivers section in Resova allows you to customize waiver settings, content, and email notifications to suit your business needs.
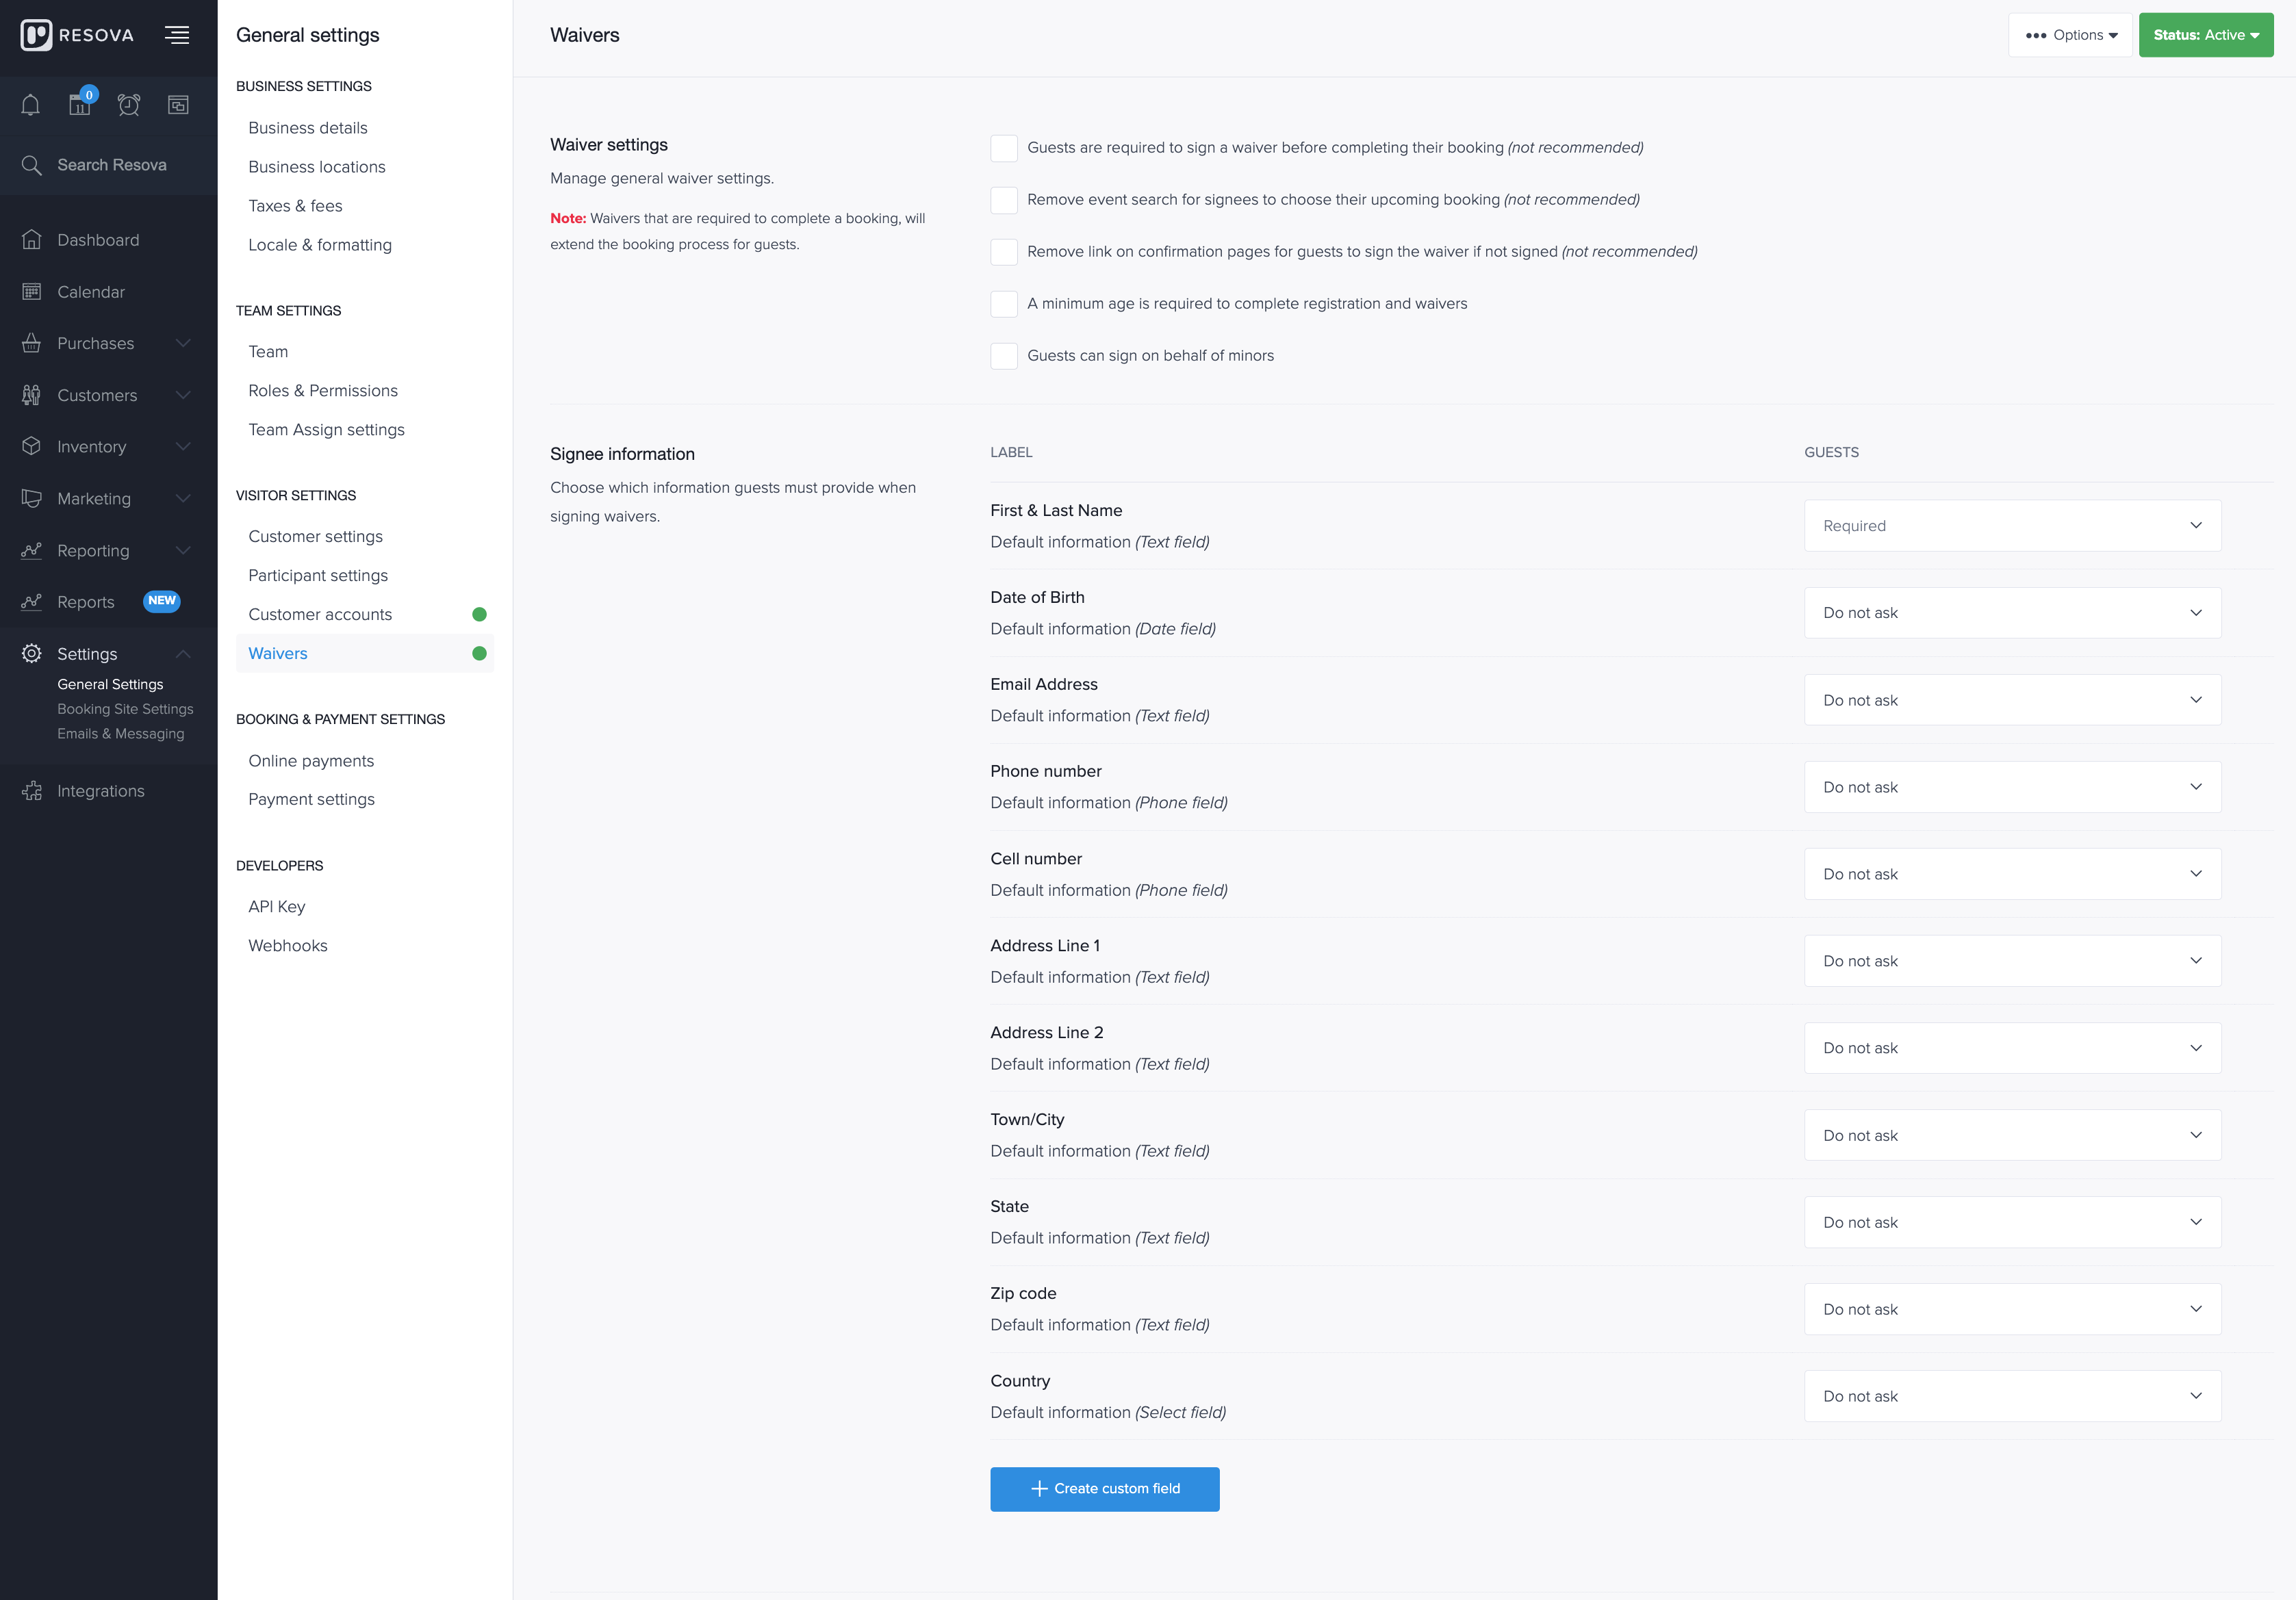
1. Waiver Settings

General Waiver Settings:
- Require Guests to Sign a Waiver: Enable this option to make signing a waiver mandatory before completing the booking process.
- Minimum Age for Signing Waivers: Specify the minimum age for signing waivers, if applicable.
- Allow Guests to Sign on Behalf of Minors: Enable this option to allow parents or guardians to sign waivers for minors.
Additional Options:
- Remove Event Search for Signees: Prevent guests from searching for their bookings to sign waivers, simplifying the process.
- Remove Waiver Links on Confirmation Pages: Disable waiver links on confirmation pages for improved security.
2. Signees Information
Customize the fields guests must complete when signing waivers:
- Personal Details: Choose whether to collect information like First/Last Name, Date of Birth, and Email Address. Options include:
- Do not ask: Field is excluded.
- Optional: Guests can provide this information voluntarily.
- Required: Guests must complete the field to proceed.
- Address Information: Similar options are available for address-related fields (e.g., Address Line 1, City, and Country).
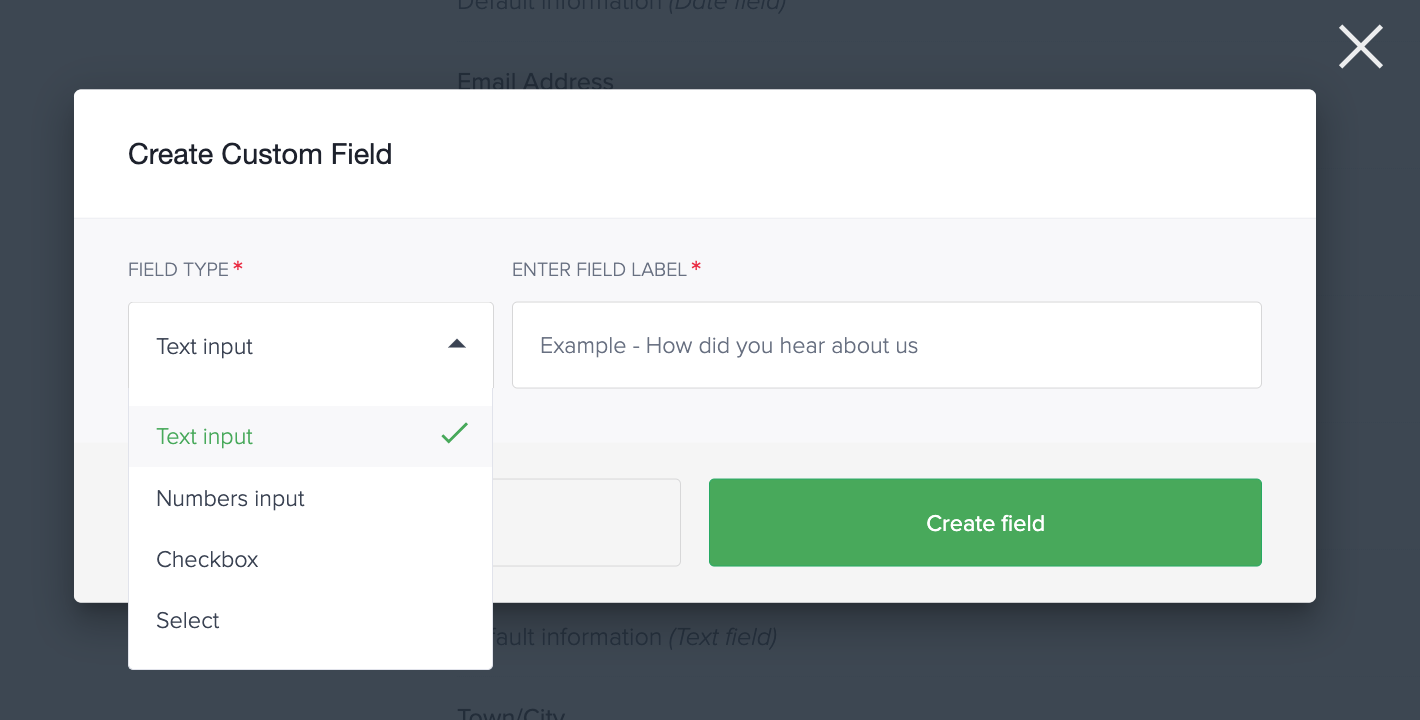
Steps to Create a Custom Field

Access the Custom Field Section
- Scroll down and click Create Custom Field.
Define the Field Type
Select the type of input you require for the custom field:
- Text Input: For short responses, such as names or single-word answers.
- Numbers Input: For numeric entries, such as age or phone numbers.
- Checkbox: For binary selections (e.g., Yes/No or Agree/Disagree).
- Select: To provide a dropdown menu of predefined options.
Enter a Field Label
- In the Enter Field Label field, add a descriptive label that explains what information you are requesting.
- Example: “How did you hear about us?”
Create the Field
- Once all required details are filled out, click the Create Field button.
Click Save & Update after configuring these settings.
3. Waiver Request Email Settings
Manage email notifications sent to guests requesting them to sign waivers:
•Email Subject: Customize the subject line for waiver request emails (e.g., “Please Sign Your Waiver for [Business Name]”).
•Email Content: Use the editor to add instructions and details about signing waivers.
•Toggle options to:
•Send waiver request emails to participants.
•Send signed waiver copies to visitors via email.
Click Save & Update to save your email settings.
4. Waiver Content
Customize the Waiver Form:
•Waiver Title: Set a clear title, such as “Waiver and Release of Liability Form.”
•Content: Use the editor to add waiver terms, policies, and conditions that guests must agree to before signing.
5. Digital Consent
Define the digital consent statement shown before signing waivers:
•Example: “By checking here, you are consenting to the use of your electronic signature in lieu of an original signature on paper.”
Click Save & Update to apply your waiver content and consent statement.

